Event Gateway
The Event Gateway provides a RESTful API to receive events from external sources. It automatically parses the request body and maps the received data to Actions Express variables for use in workflow design.
The Event Gateway is preconfigured on your Actions Express instance and ready to receive events.
Authentication
All Event Gateway endpoints require either basic authentication or are unauthenticated. See the respective endpoint for its authentication requirements.
When basic authentication is used, the username is the Events Client ID of the tenant, and the password is the tenant's Secret Key.
In addition, all request URLs feature the Tenant ID.
Acquiring the Events Client ID
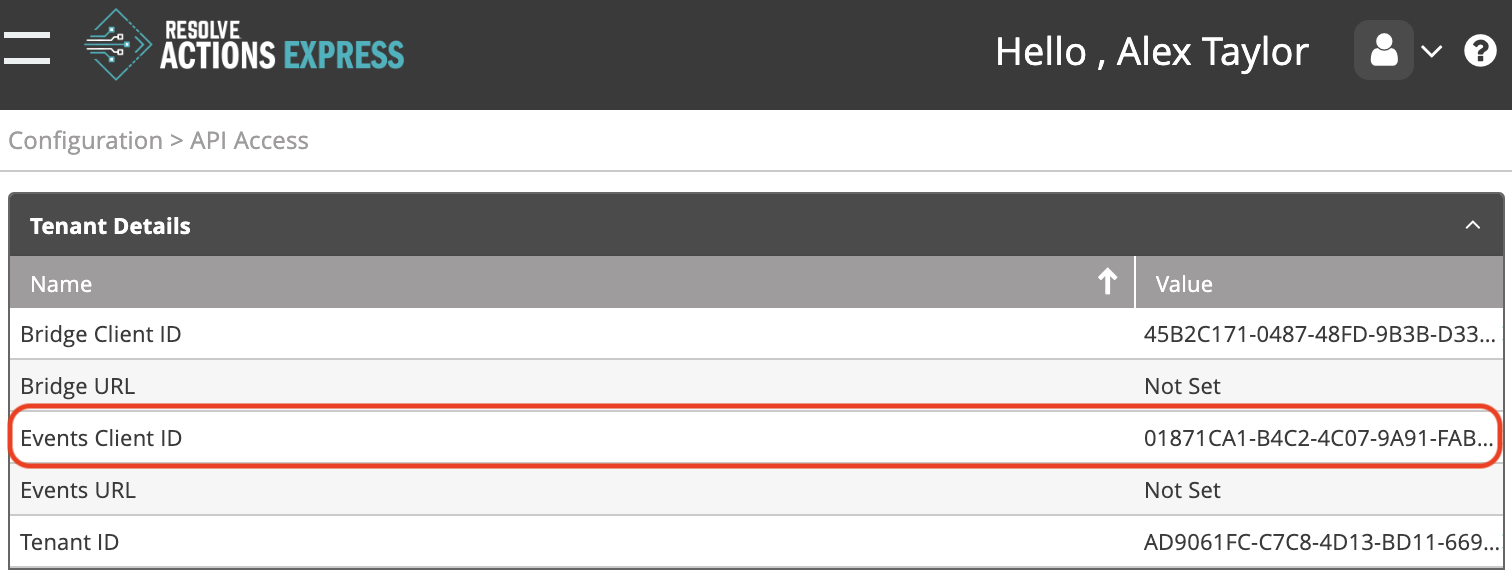
The Events Client ID is used as the username when basic authentication is required. Take these steps to obtain it:
- From the top navigation bar, open the hamburger menu and go to Configuration > API Access > Tenant Details.
- Take note of the Value field of Events Client ID.
Acquiring the Secret Key
The Secret Key is used as the password when basic authentication is required. Take these steps to obtain it:
- From the top navigation bar, open the hamburger menu and go to Configuration > API Access > Secret Keys.
- In the Secret Keys section, click the plus sign at the top right of the list.
The Secret Keys – New Secret Key sidebar appears.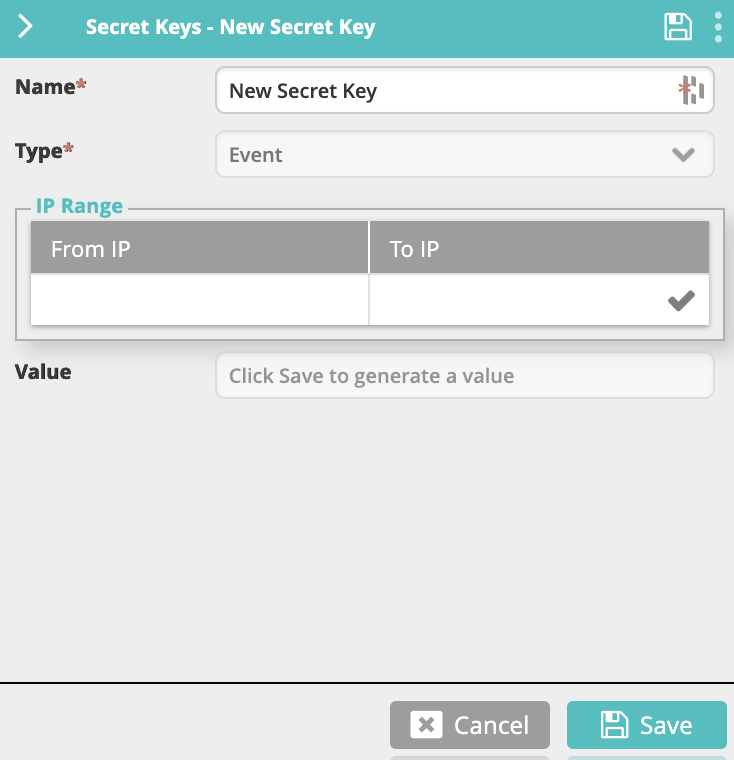
- In Name, enter a name that will help you identify the key.
- (Optional) In IP Range, limit the key access to specific IP addresses for additional security:
- Enter an IP address range, network, or single IP and then click the check sign to create a new line.
Examples:192.0.2.10to only allow a single address (enter the same IP address in the From IP and To IP columns).192.0.2.0/24to allow an entire network.192.0.2.10to192.0.2.20to allow a range of IP addresses.
- Keep adding lines until you add all the IPs that you want.
- Enter an IP address range, network, or single IP and then click the check sign to create a new line.
- Click Save.
- From the Generate Secret Key dialog box that appears, take note of the Value field.caution
The value is only presented once. If you fail to copy it, you will have to regenerate the key([regenerating-secret-keys](/express/SaaS/Configuration/regenerating-secret-keys/)).
- Click OK.
Acquiring the Tenant ID
The Tenant ID is used as part of the request URL. Take these steps to obtain it:
- From the top navigation bar, open the hamburger menu and go to Configuration > API Access > Tenant Details.
- Take note of the Value field of Tenant ID.
Sending an Event to the Event Gateway
Use an authenticated POST request to send events to Actions Express.
HTTP Method
POST
Request URL
Send requests to the following URL:
http://bridge.resolveactions.com/api/v1/gateway/PostMessage/<Tenant ID>
Where:
<Tenant ID>is the value of Tenant ID.
Request Authentication
Basic authentication is required. See Headers.
Request Headers
The following request headers are required:
Content-Type—Indicates the media type of the body. Supported values:application/jsonapplication/xmltext/plain
Authorization—Basicauthentication is required. See Authentication to learn how to set up a username and a password.
Body Format
Requests can be sent in the following formats:
- XML (text/xml)
- JSON
- String
Response
The Event Gateway replies with one of the status codes listed below.
| Status Code | Message | Description |
|---|---|---|
| 200 | Success | Message was sent successfully. |
| 401 | Unauthorized | Indicates an issue with the credentials or with the tenant’s files on the bridge. |
| 403 | Forbidden | The source IP is not included in the allowed IP range. |
Examples
In the following example, we pass three custom parameters (eventDetail1, eventDetail2, eventDetail3).
- XML
- JSON
<?xml version="1.0" encoding="UTF-8"?>
<root>
    <eventDetail1>Event Gateway detail 1</eventDetail1>
    <eventDetail2>Event Gateway detail 1</eventDetail2>
    <eventDetail3>Event Gateway detail 1</eventDetail3>
</root>
{
    "eventDetail1": "Event Gateway detail 1",
    "eventDetail2": "Event Gateway detail 1",
    "eventDetail3": "Event Gateway detail 1"
}
The returned response is OK (status code 200 - Success).
Viewing Incoming Requests
Incoming requests can be viewed from the Main Menu under Insight > Audit Trail.

To see details about a specific event, click in its row in the Audit Trail. The details will be displayed in the Activity Log panel below.
To see details about a returned message, click the green arrows in the desired row of the Message column. This is an example of how they will look:
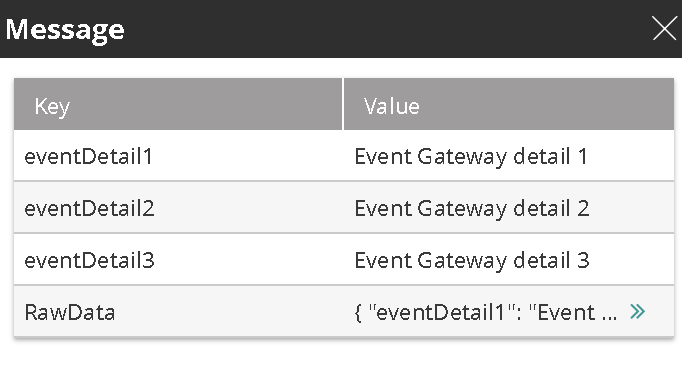
Each request parameter is displayed as a row in the Key column. It is automatically mapped as a variable that you can use to access the parameter's value in workflows—for example: %eventDetail1%, %eventDetail2%, %eventDetail3%.
Each event includes the following details:
- The parameters sent. In our example, this is
%eventDetail1%,%eventDetail2%,%eventDetail3%. RawData: The raw request body.
Using %body% as a variable in a workflow will return the entire row data.
Checking the Status of the Event Gateway
You can obtain real-time information about the status of the Event Gateway using an unauthenticated request.
HTTP Method
GET
Request URL
Send requests to the following URL:
http://bridge.resolveactions.com/api/v1/gateway/status/<Tenant ID>
Where:
<Tenant ID>is the value of Tenant ID.
Request Authentication
No authentication is required.
Request Headers
There are no required request headers.
Response
The following status codes apply to getting the status of the Event Gateway:
| Status Code | Message | Description |
|---|---|---|
| 200 | Success | Event Gateway is operational. |
| 401 | Unauthorized | Indicates an issue with the credentials or with the tenant’s files on the bridge. |
| 403 | Forbidden | The source IP is not included in the allowed IP range. |
Automating an Incoming Event
Sending a request to the Event Gateway generates an event in Actions Express, visible in the Audit Trail. To automate the event, you need to create a trigger for a workflow.
Triggers for the Event Gateway work by matching a global variable with the data received in the event. If you want to react to multiple values of the same parameter, repeat the following procedure for each of them, creating separate global variables.
Take these steps to automate the event coming in from the Event gateway:
- Create a global variable that matches the data that you expect to receive from the external source:
- For Name, enter the exact name of a parameter received as part of the incoming request's body.
Matching a single body parameter is enough to trigger an automation. - For Mode, select Set Variable's Value on Every Incident Update.
- Type cannot be set in this use case.
- Leave Value empty.
- For Name, enter the exact name of a parameter received as part of the incoming request's body.
- Create the Workflow that will automate the event if it doesn't already exist.
You can create a non-functioning workflow and build it later. - Create a trigger for a workflow:
- When prompted to create a Condition, configure it as follows:
- Set Condition Clause to any value. It is irrelevant as the condition only requires a single condition entry.
- Under Condition Logic, add an entry as follows:
- Type—Global Variables.
- Module Form—Cannot be set in this use case.
- Object—Select the global variable that you created for this automation.
- Operator—Equals.
- Value—The exact value of the parameter from the request's body that matches the global variable.
- When prompted to create a Trigger, configure it as follows:
- Ensure that Enabled is checked.
You might want to leave it unchecked if you are yet to build the workflow. - Under Conditions, create an entry as follows:
- Condition—Select the condition that you created for this event.
- Workflow—Select the workflow that you created for this event.
- Optionally, set the rest of the options as needed.
- Ensure that Enabled is checked.
The selected workflow will execute the next time that the Event Gateway receives the parameter and value combination that you specified.